The easiest way to fix the ‘WordPress update has failed to complete’ error is to simply delete the “.maintenance” file from your root folder inside cPanel.
It’s easier said than done. That’s the reason, I have made this step-by-step guide to help you solve this error in no time.
Why Does The ‘Automated Update Has Failed’ Message Appear?
I came across this WordPress error message way back in 2015.
This happened just after I installed a new plugin on my WordPress site.
So, I tried a few things like deleting the plugin and reinstalling it. It didn’t work. The annoying message was still there.
The same error message can reveal when you update your theme or WordPress core files.
So, I tried to reason it logically and found the solution.
Here’s what happens!
As soon as you update anything on WordPress, It goes into a maintenance mode and adds a file name “.maintenance” in the root folder.
As soon as the update is done, this file gets deleted automatically.
But for some reason, this file can still be there and you will see that weird “An automated WordPress update has failed to complete – please attempt the update again now” on the top of your WordPress dashboard.
Ways to Solve Automated WordPress Update Error Issue
So, the process is simple.
We will enter the root folder of your WordPress website and simply delete the “.maitenance” file. That’s it.
Depending on what you have access to, follow these steps.
1. Fix automated update WordPress error with cPanel
Step – 1: Get into your cPanel
It’s fairly easy to log in to cPanel. Just add ‘/cpanel’ to the end of your web address.
For example, if your web address is https://mysite.com, typing in “ https://mysite.com/cpanel” in the address bar will take you straight to the cPanel login page.
Step 2: Open your file manager
You will find the ‘File Manager’ under the ‘Files’ tab in your cPanel. It’s usually the first or second tab in most cPanel dashboards.
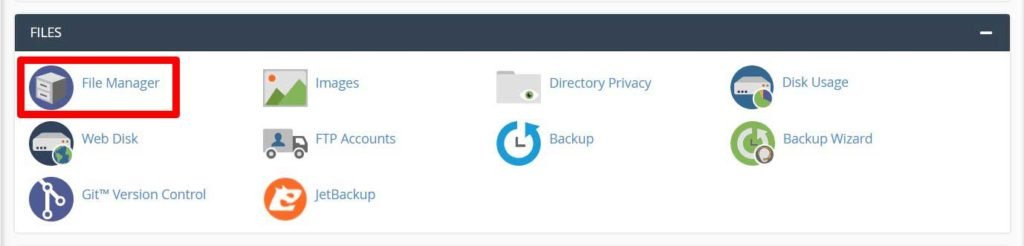
Click on it and you will get inside your root folder.
Step 3: Go to your WordPress files folder
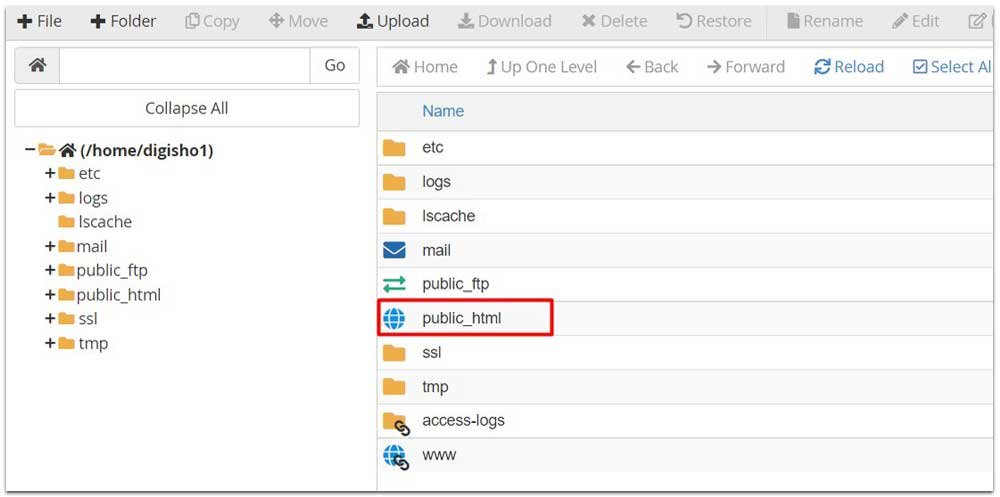
To find the “.maintenance” file you will need to go into the “public_html” folder. Sometimes, the maintenance file is found inside the “staging” folder and under the “demo” folder.
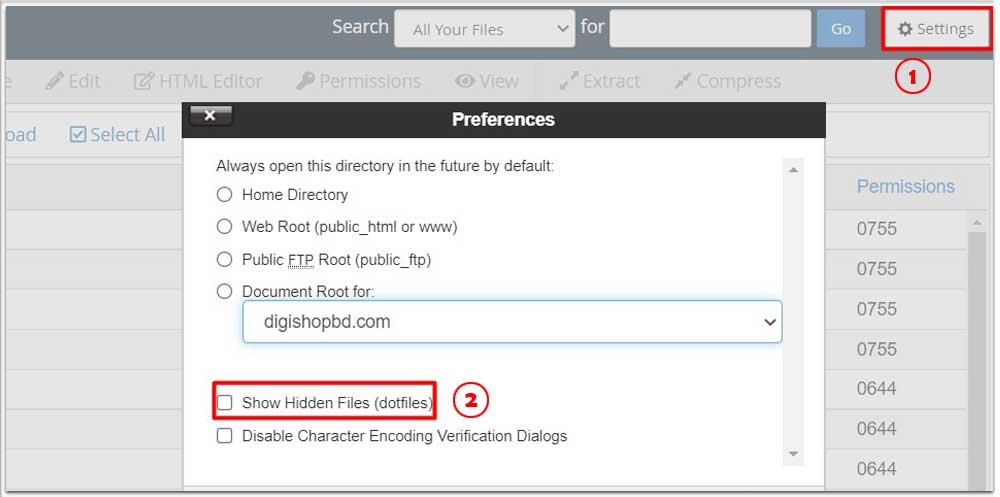
Step 4: Unhide the “.Maintenance” file
Now that you are in the right folder, you won’t be able to find the file you are looking for.
First, go to settings at the right corner of your cPanel.
A pop-up will appear.
Select the ‘Show Hidden Files’ option and now the “.maintenance” file will be visible.
Step 5: Delete the file and refresh WordPress
Right-click on the “.maintenance” file. Select the delete option from the list & confirm.
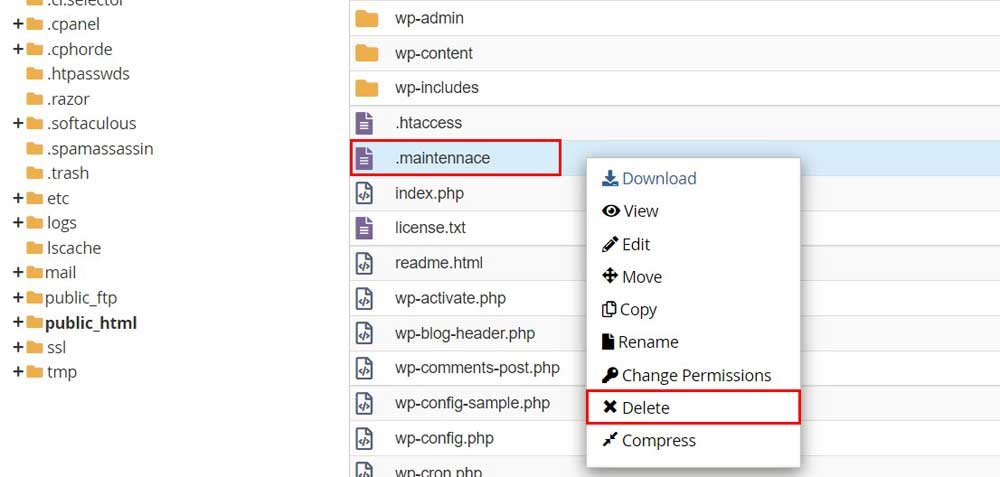
Go back to your WordPress dashboard and reload it.
The error message will no longer appear.
2. Fix Automated update WordPress error with FTP
Sometimes, your host or domain won’t give you access to cPanel.
In that case, you will need to take an old-school approach.
Here is the step by step process:
Step 1: Connect to your server with an FTP
For this, you will need to connect your web address to an FTP.
In this case, you can use FileZilla which is free software.
Just download the software, install it, provide your domain and FTP login credentials and you will be in.
Step 2: Go to your root folder
The root folder in FileZilla is usually “public_html”. Click on it
Step 3: Find the “.maintenance” file
Here you don’t need to unhide the .”maintenance” file. You will find it easily.
Step 4: Delete the file and refresh WordPress
Delete this file and refresh your WordPress Dashboard. The error will disappear.
Connect with us for your website maintenance
Fixing this WordPress Update error isn’t tough.
However, you would come upon several such issues that require more technical knowledge and a simple tutorial won’t be enough.
Here’s where we can come to help.
I have an experienced team of WordPress experts that can quickly solve all sorts of WordPress issues.
You can check our website maintenance plans to make sure your site suffers zero downtime.